
Over the summer we overhauled our garden as some fence panels had fallen down in a storm, so we took the opportunity to re-do the fence and give the garden a redesign (not that there was much to redesign as it was pretty sparse!) We added a raised flower bed and moved some plants around and I planted some new bulbs.
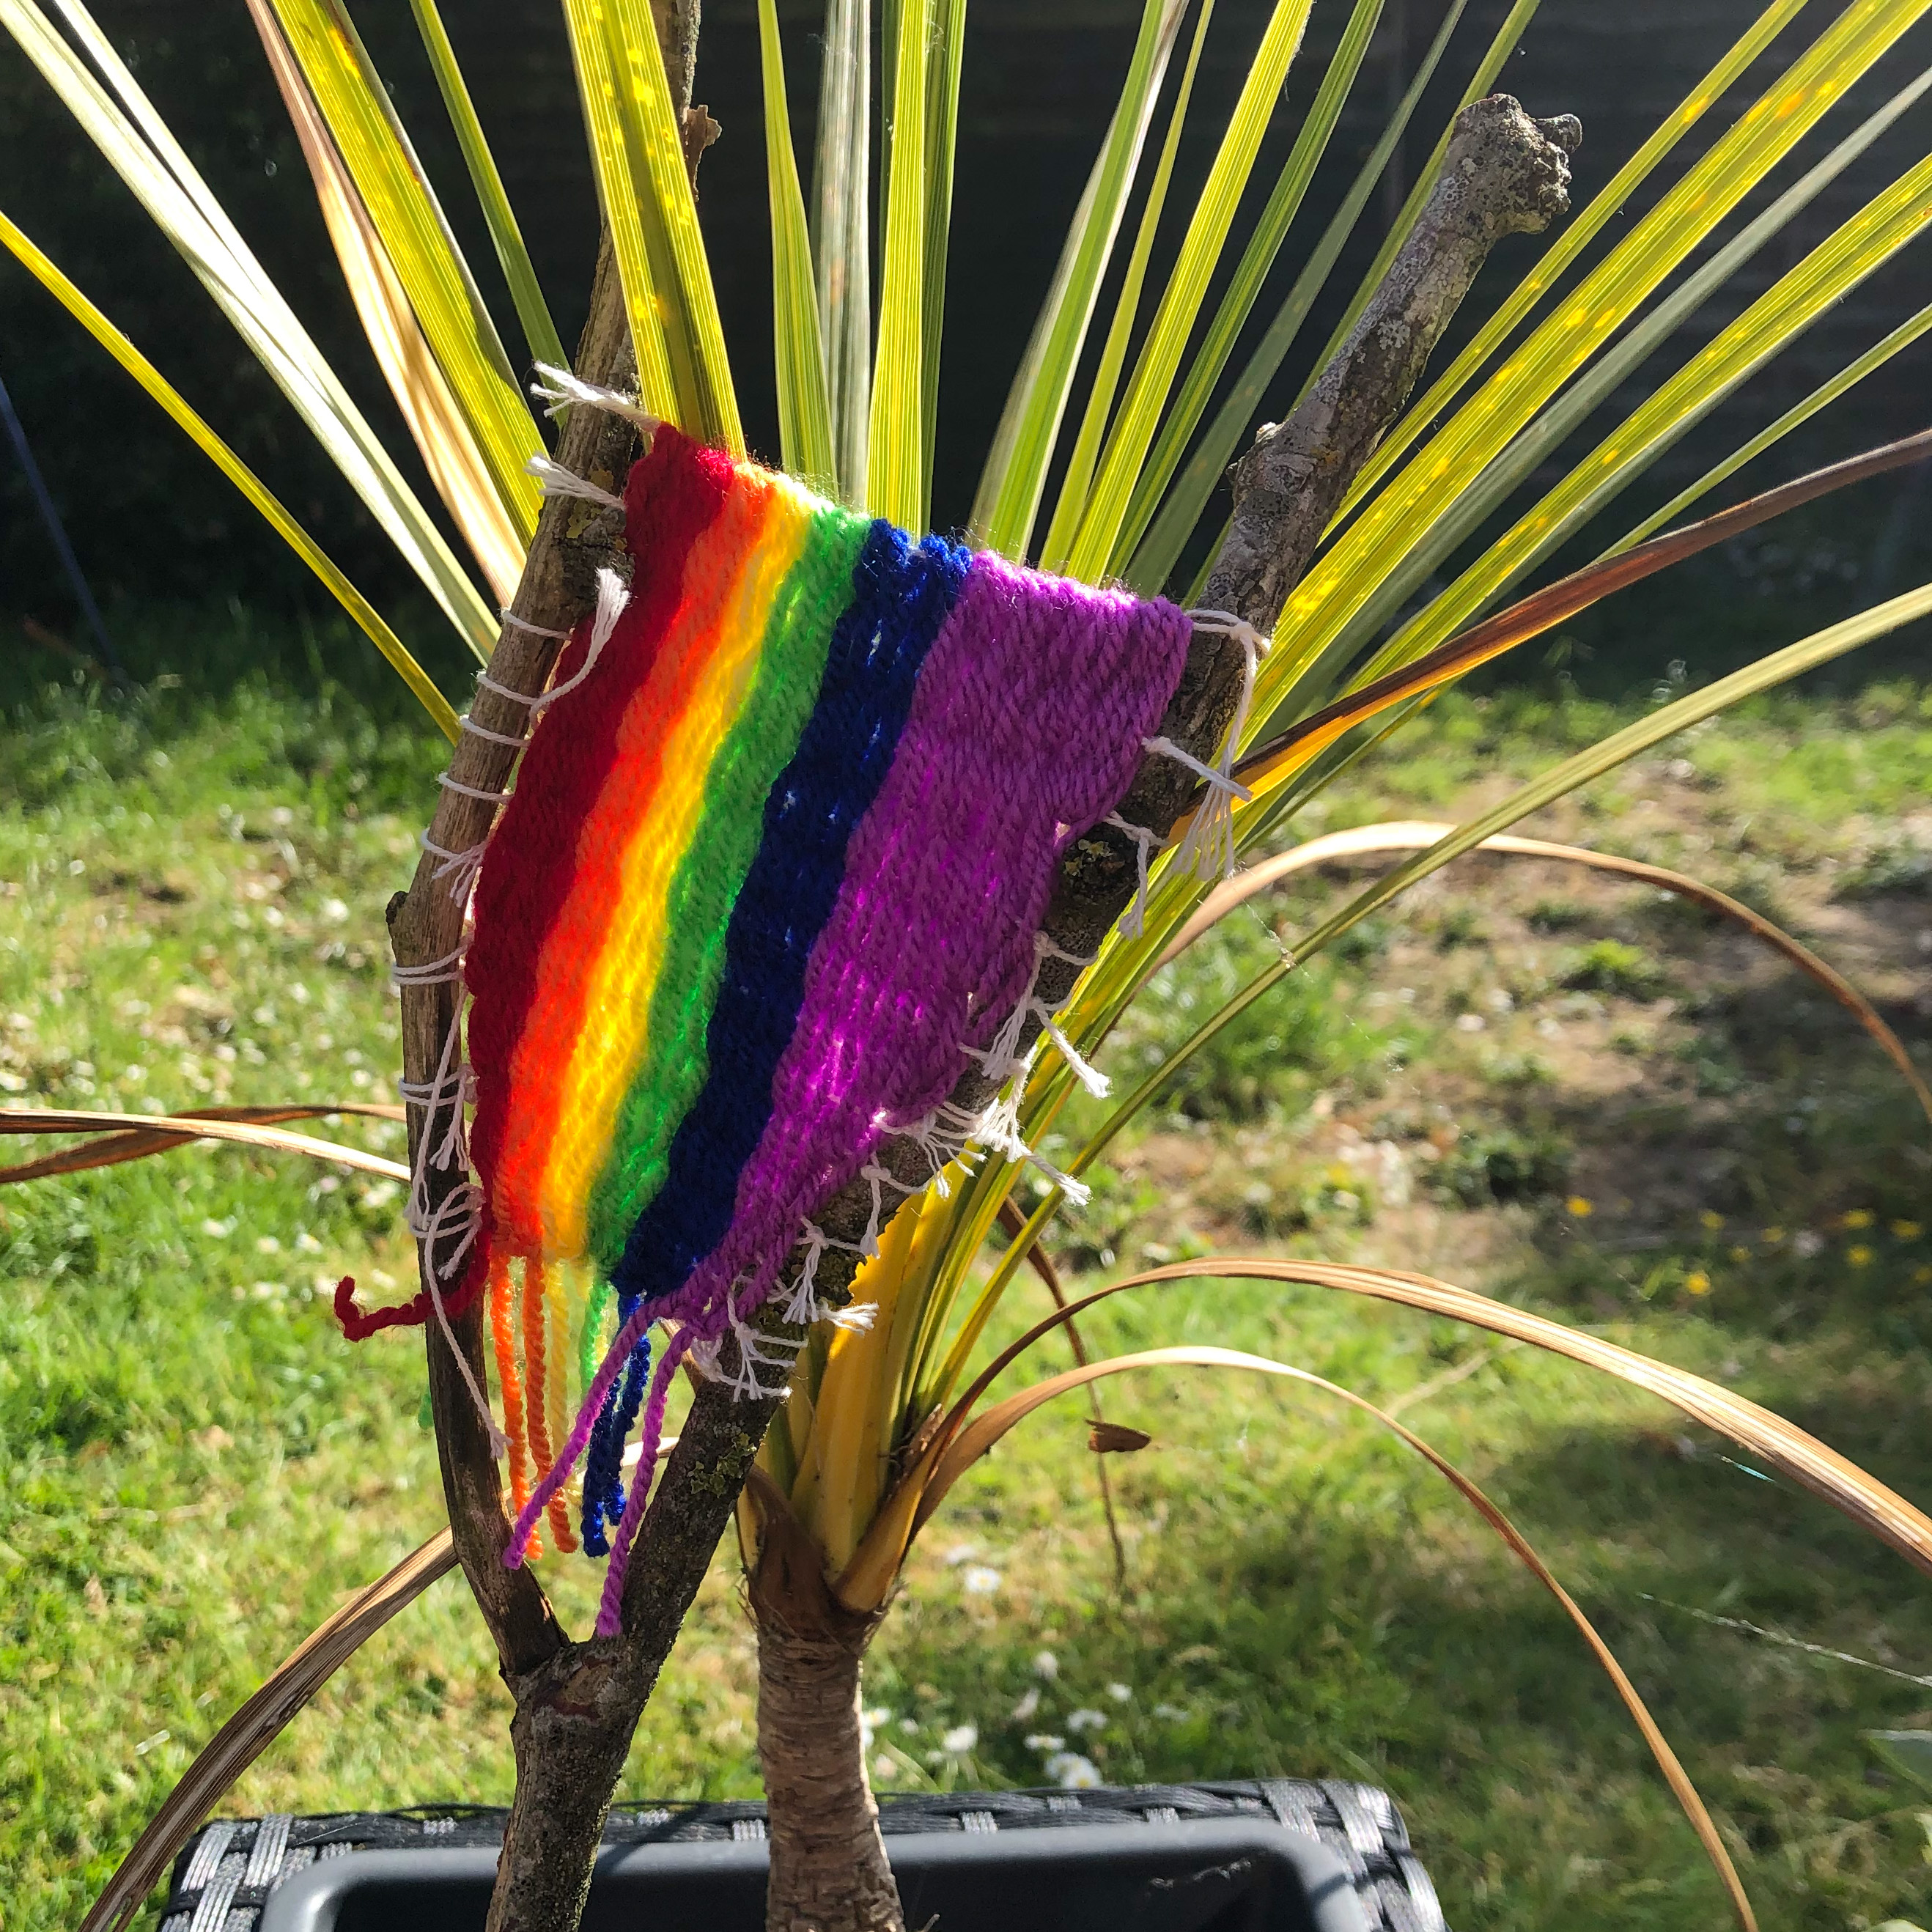
While we were waiting for things to grow and develop, I wanted to add a bit of colour to the garden in places and I had seen branch weaving on Pinterest, which I was dying to try. I’m really pleased with it and it is still going strong, having lasted the winter and it still looks pretty much the same as it did when I first made it.
Do you want to have a go at making your own? Read on for my tutorial.
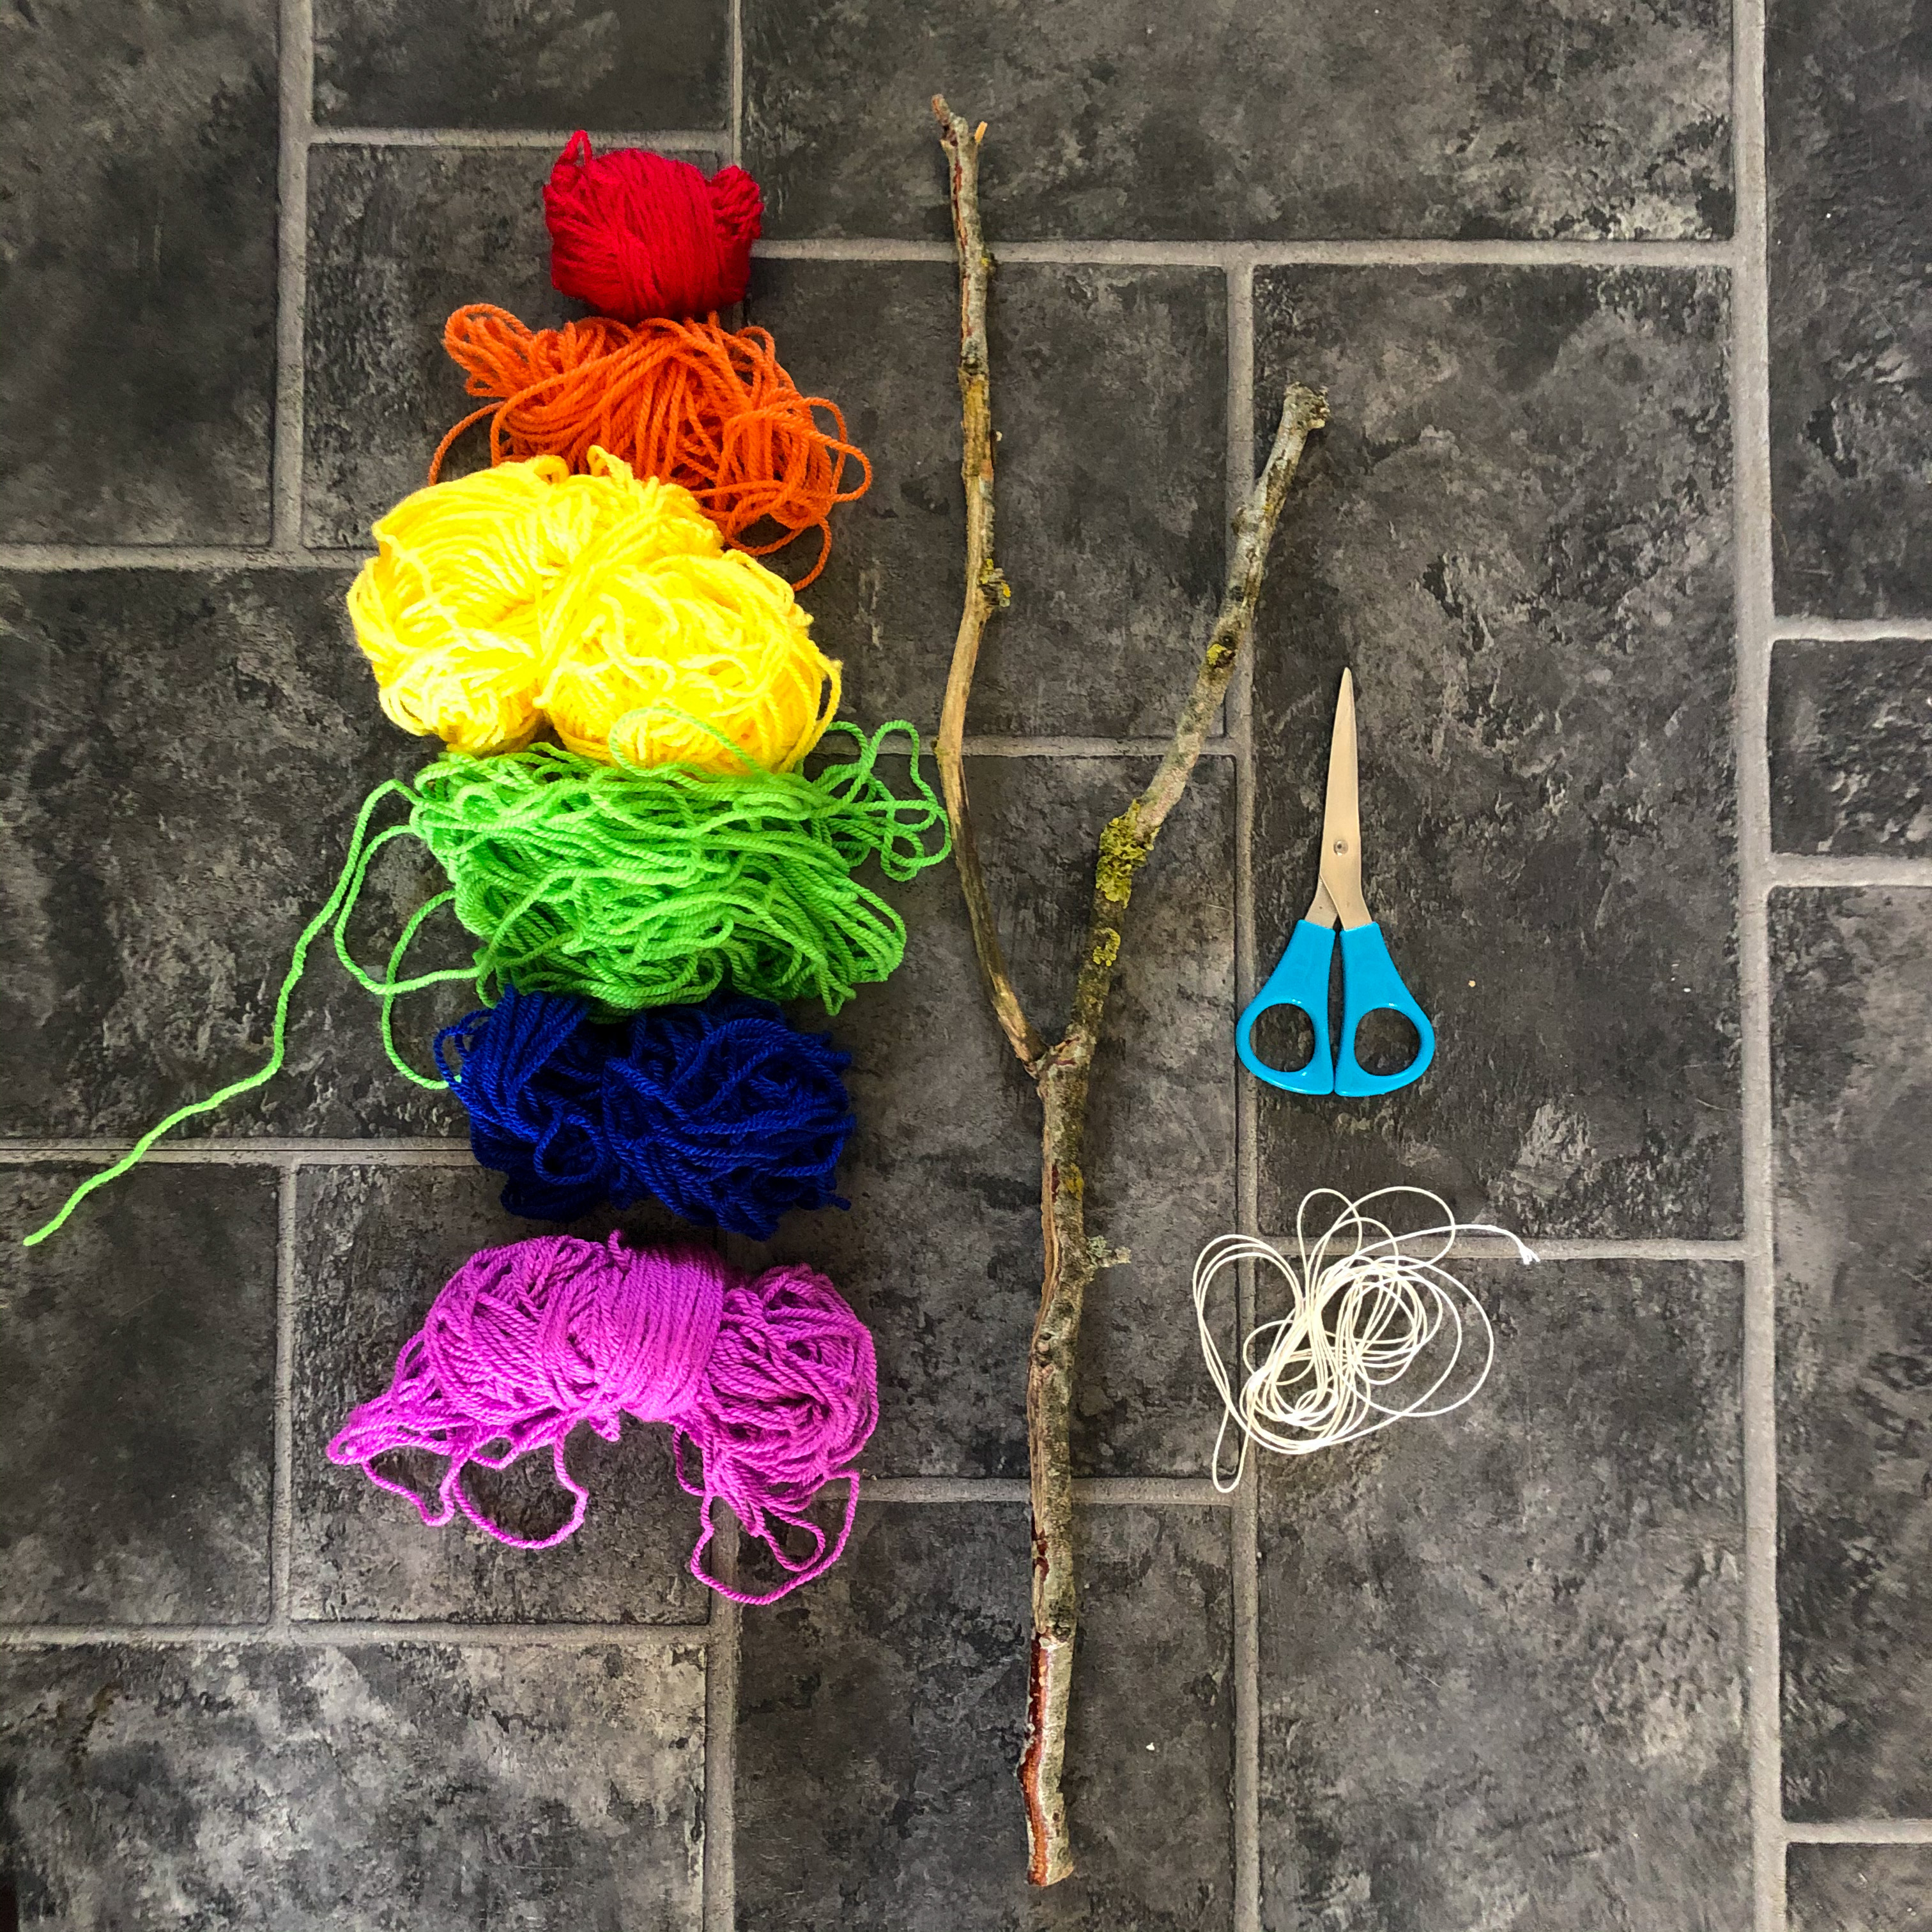
You will need:
- Acrylic wool
- V shaped branch
- String
- Scissors
- sewing needle (optional)
How to do it:
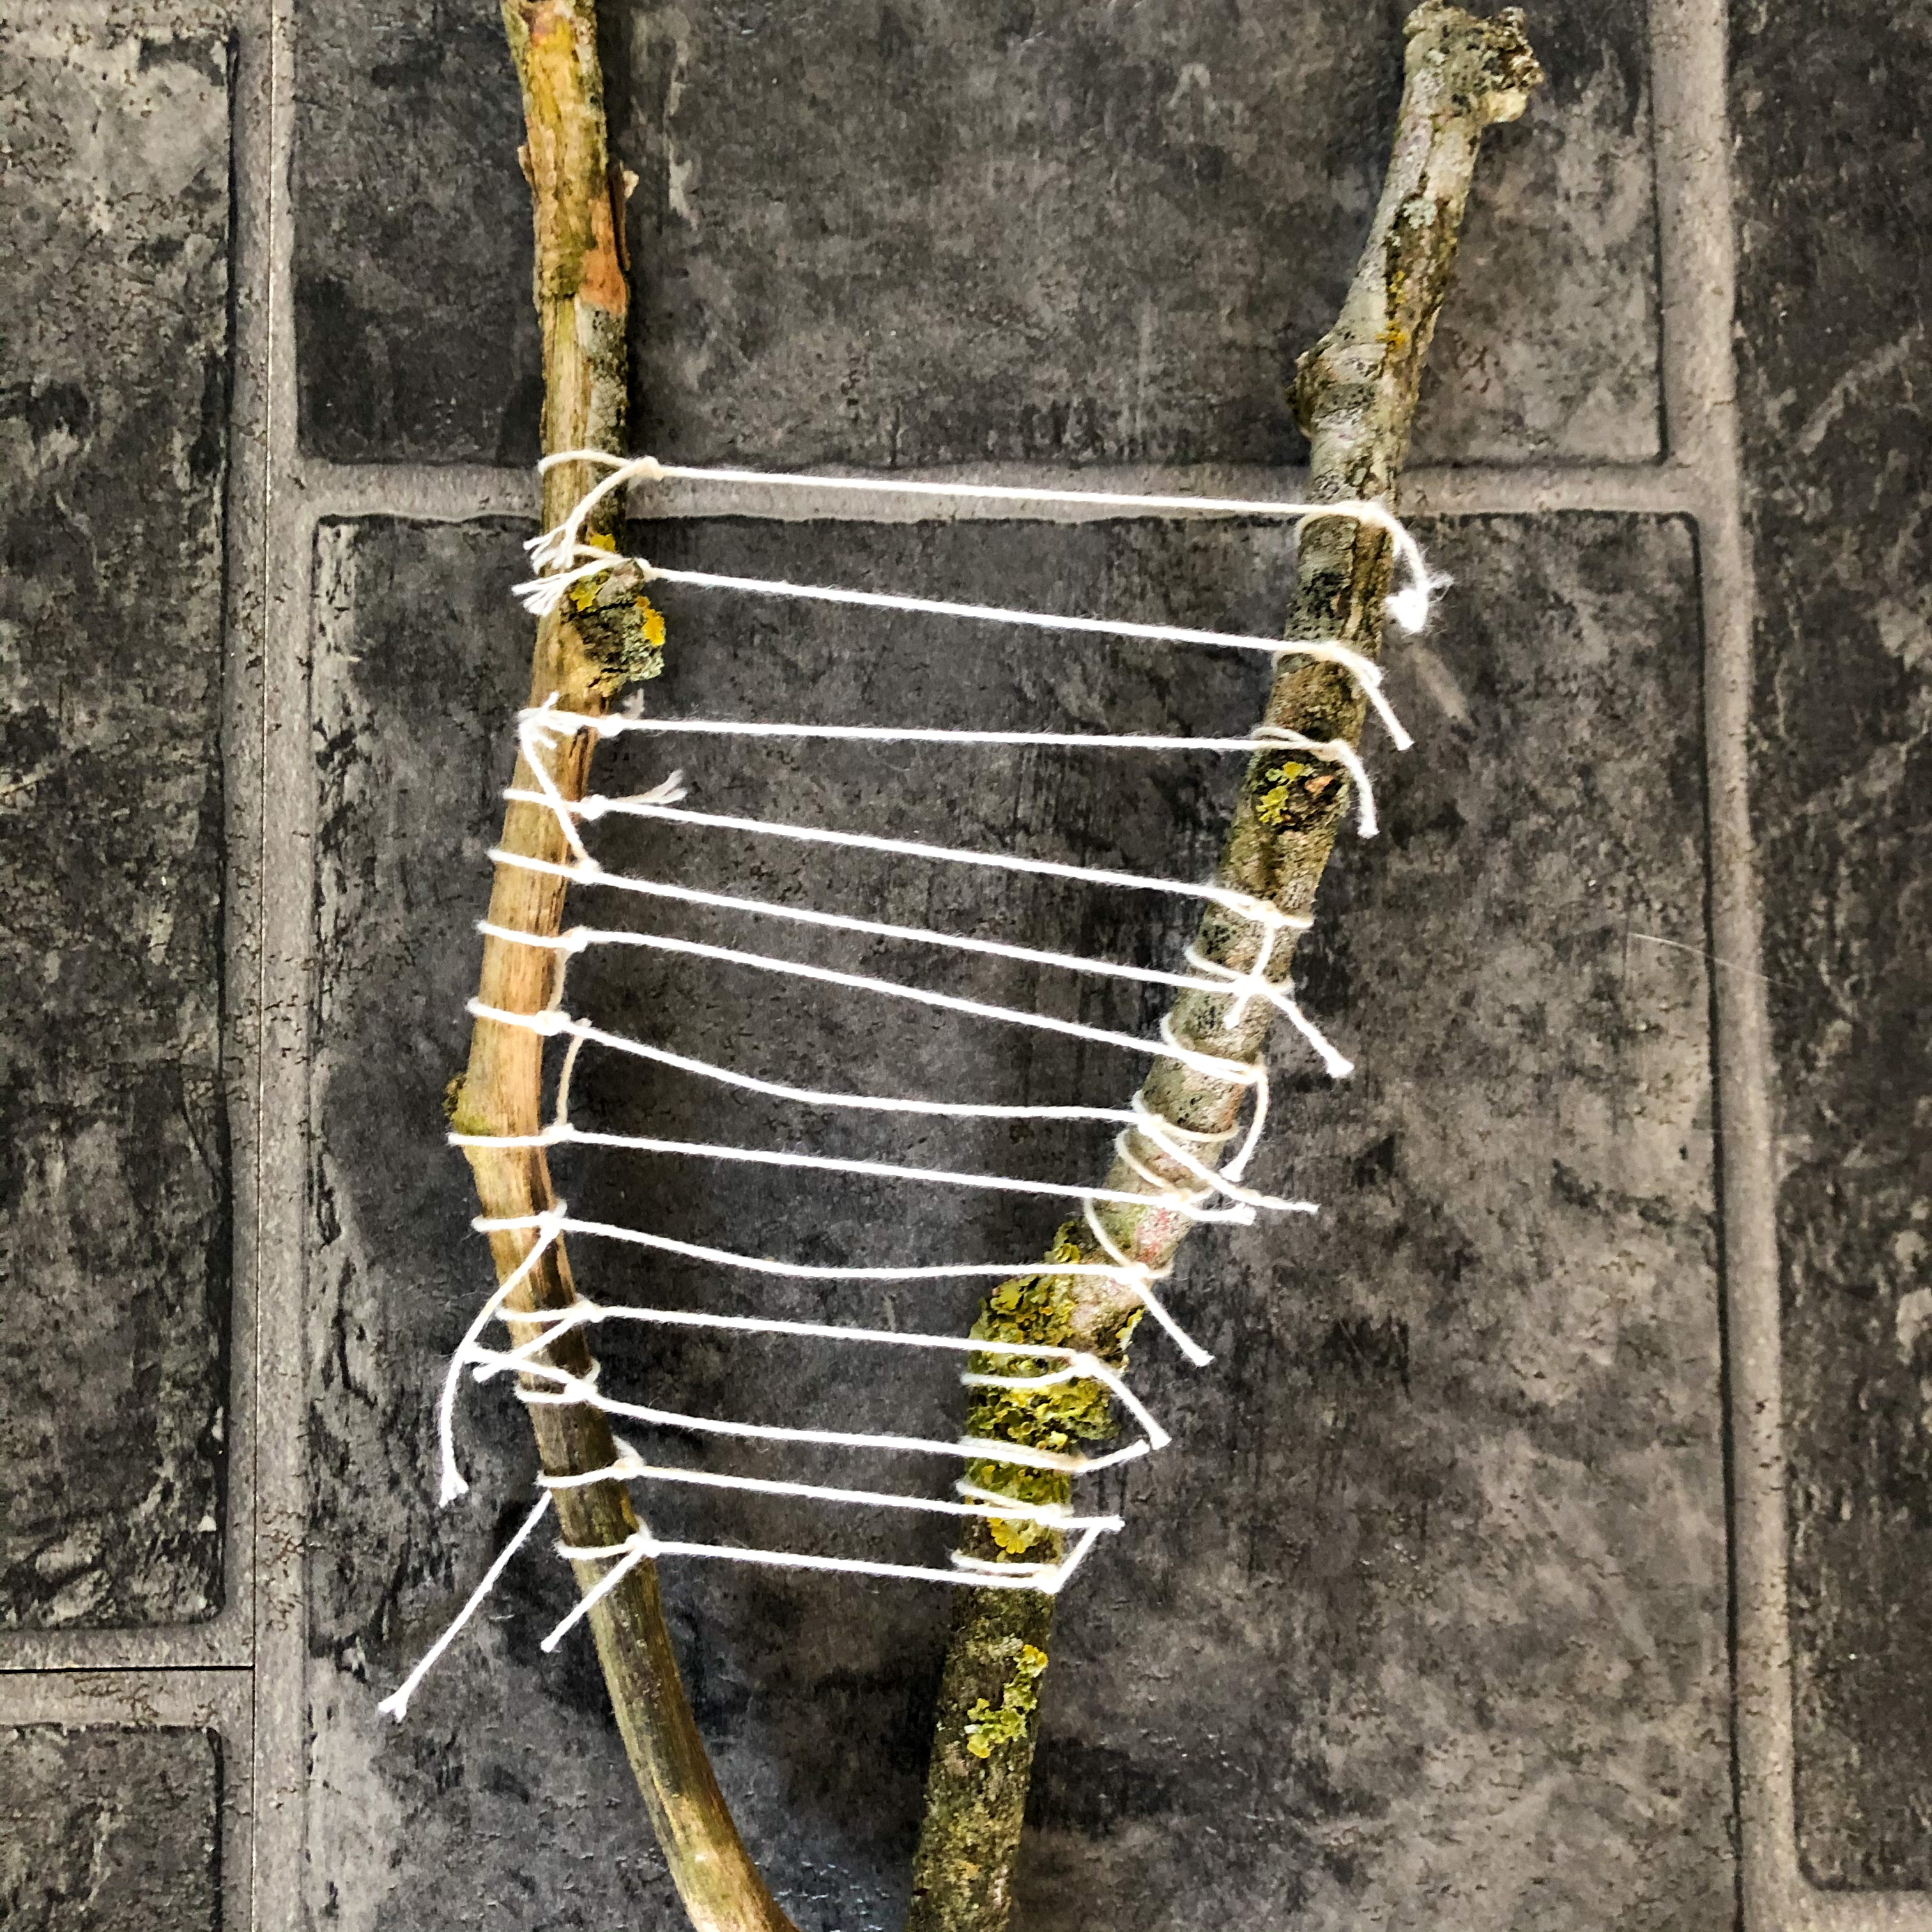
- Tie your string on both sides of the V using a double knot, you want this to be as tight as possible to stop it from slipping on the branch. Trim off your excess lengths and repeat leaving a gap between each row
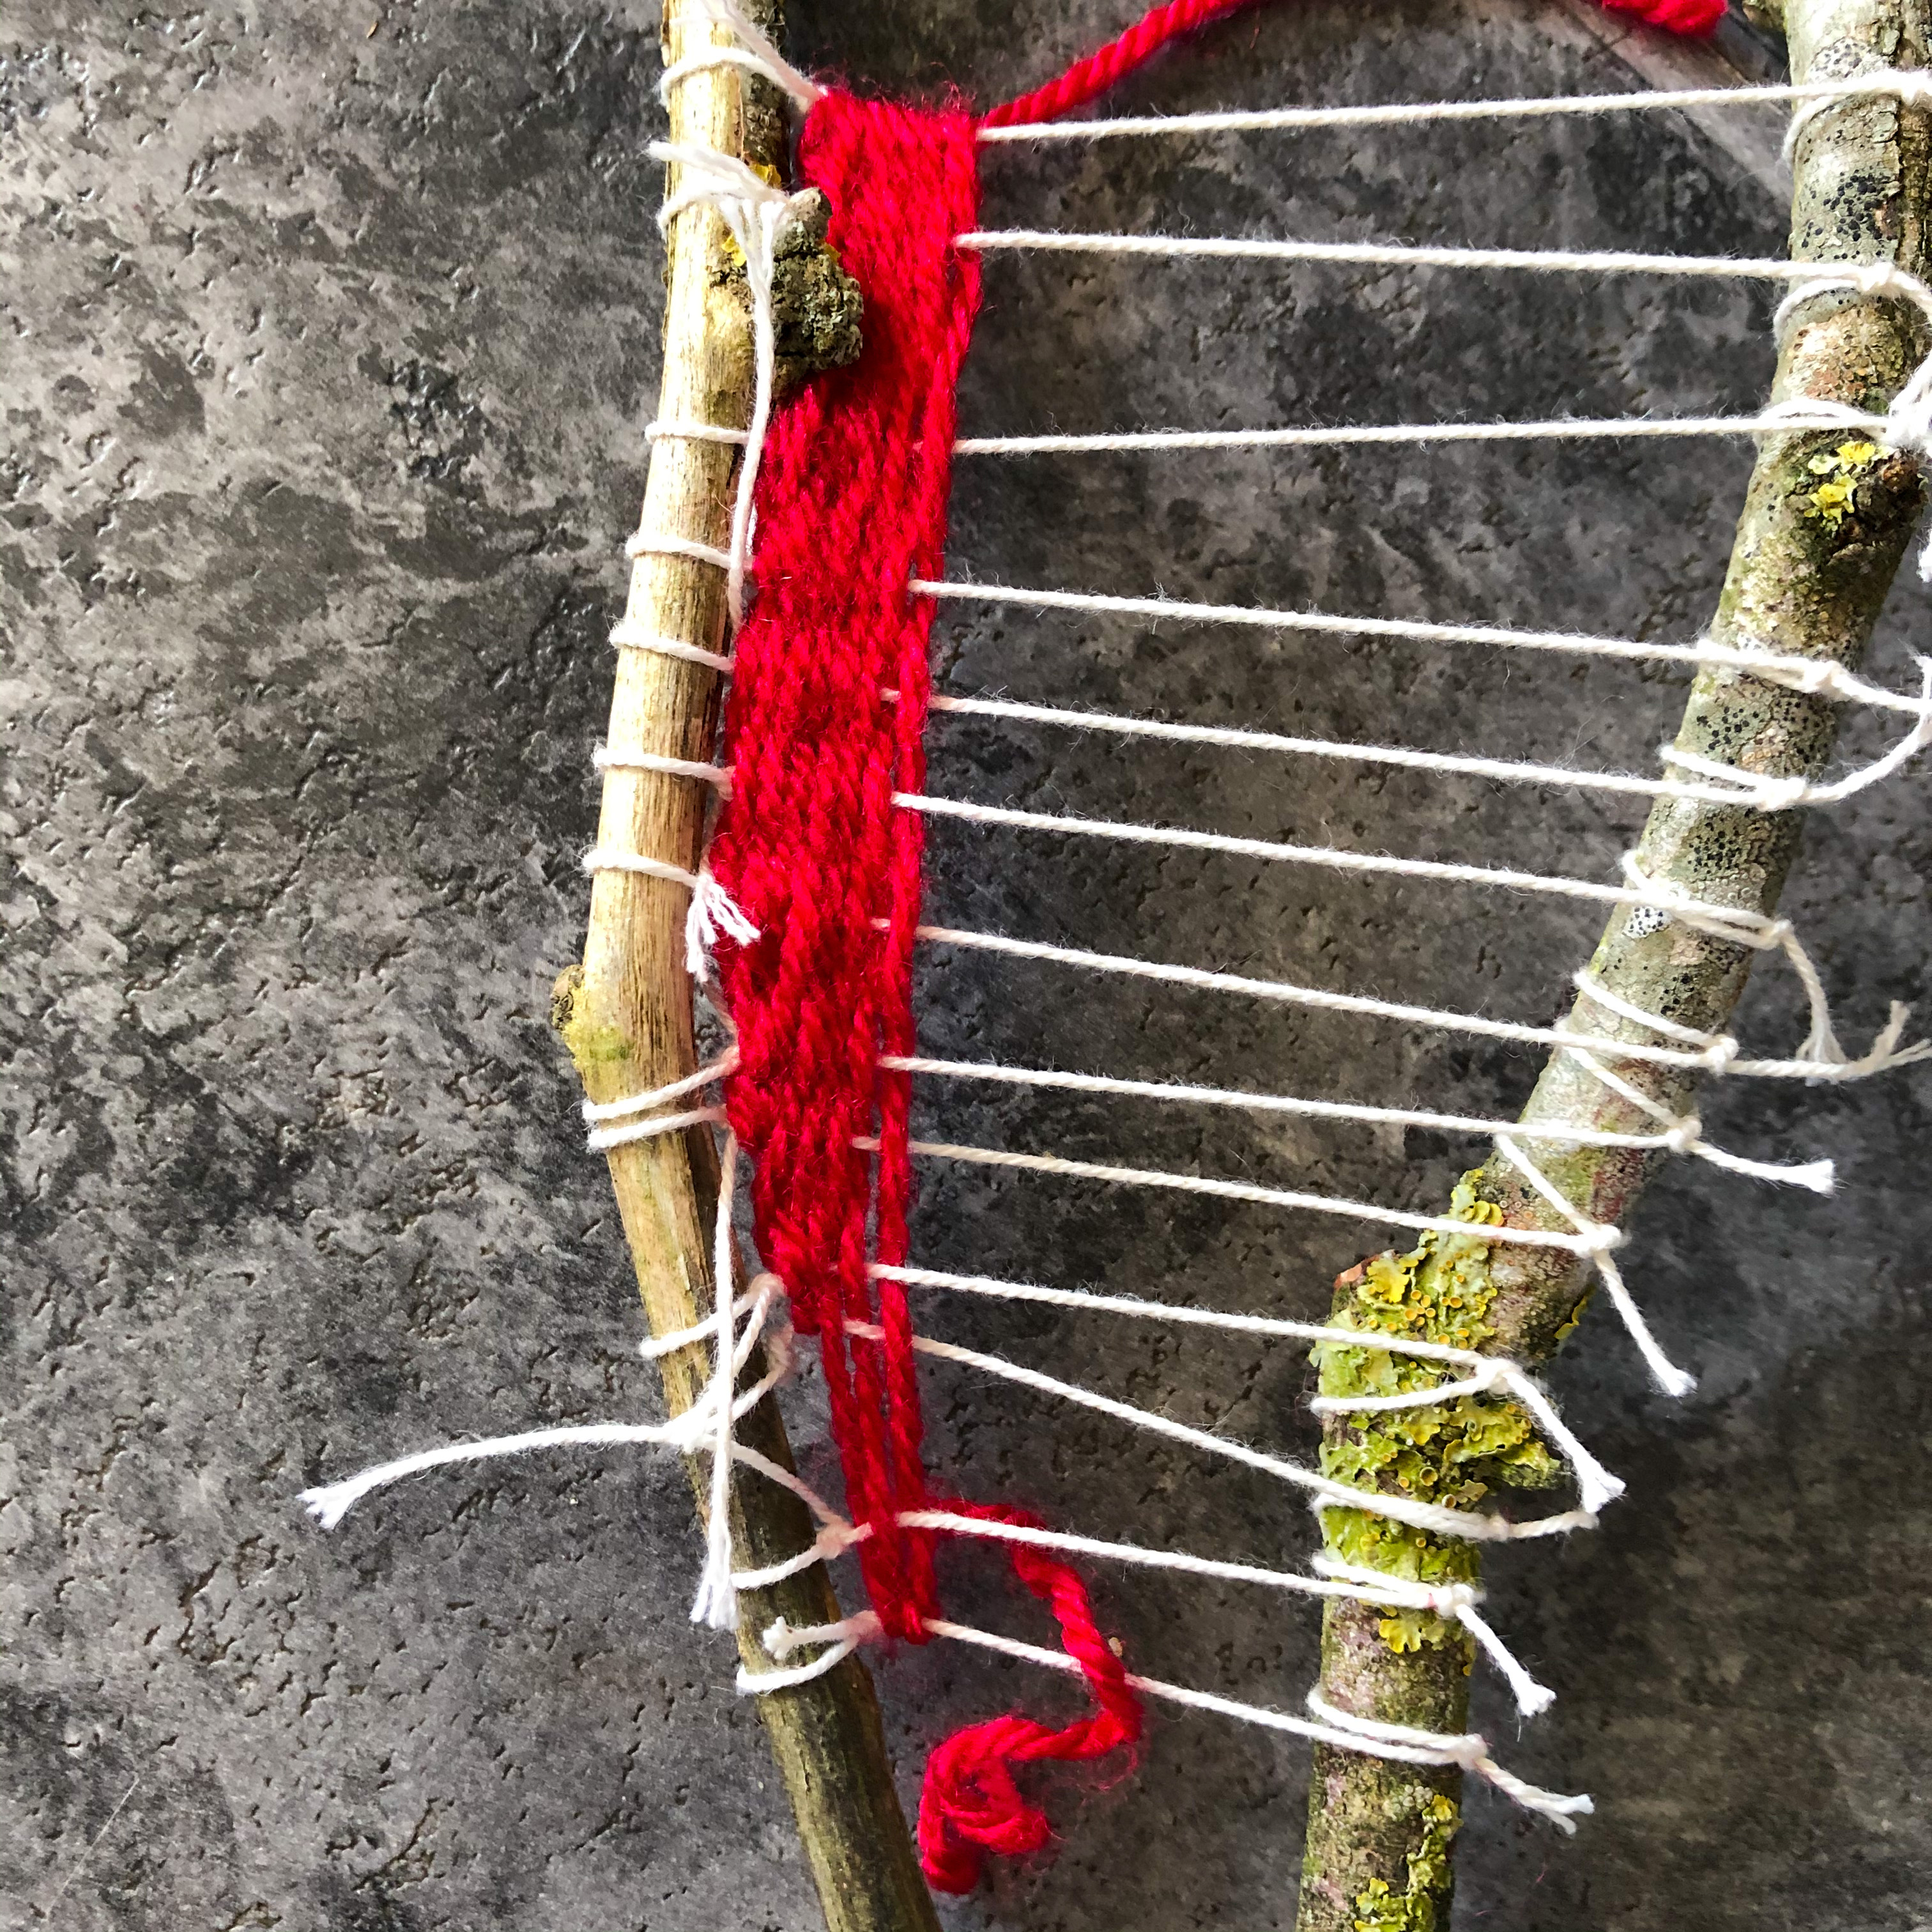
2. Attach your yarn to the top of the piece of string either to the left or right. Take a good look at your branch and look at the shape of the V. I chose the top left so that I could follow the shape of the branch.
3. Weave your wool over one piece of string and under another until you reach the branch. I didn’t go all the way down to the bottom of mine due to its shape.
4. Repeat step 4 until you want to change colour
5. To change colour weave down to the bottom of your branch and tie off. Tie in your new colour and weave in rows until you want to change colour again until the v is full and tie off
6. Leave your ends hanging down or you could weave them back into the main piece – you will need a needle for this.
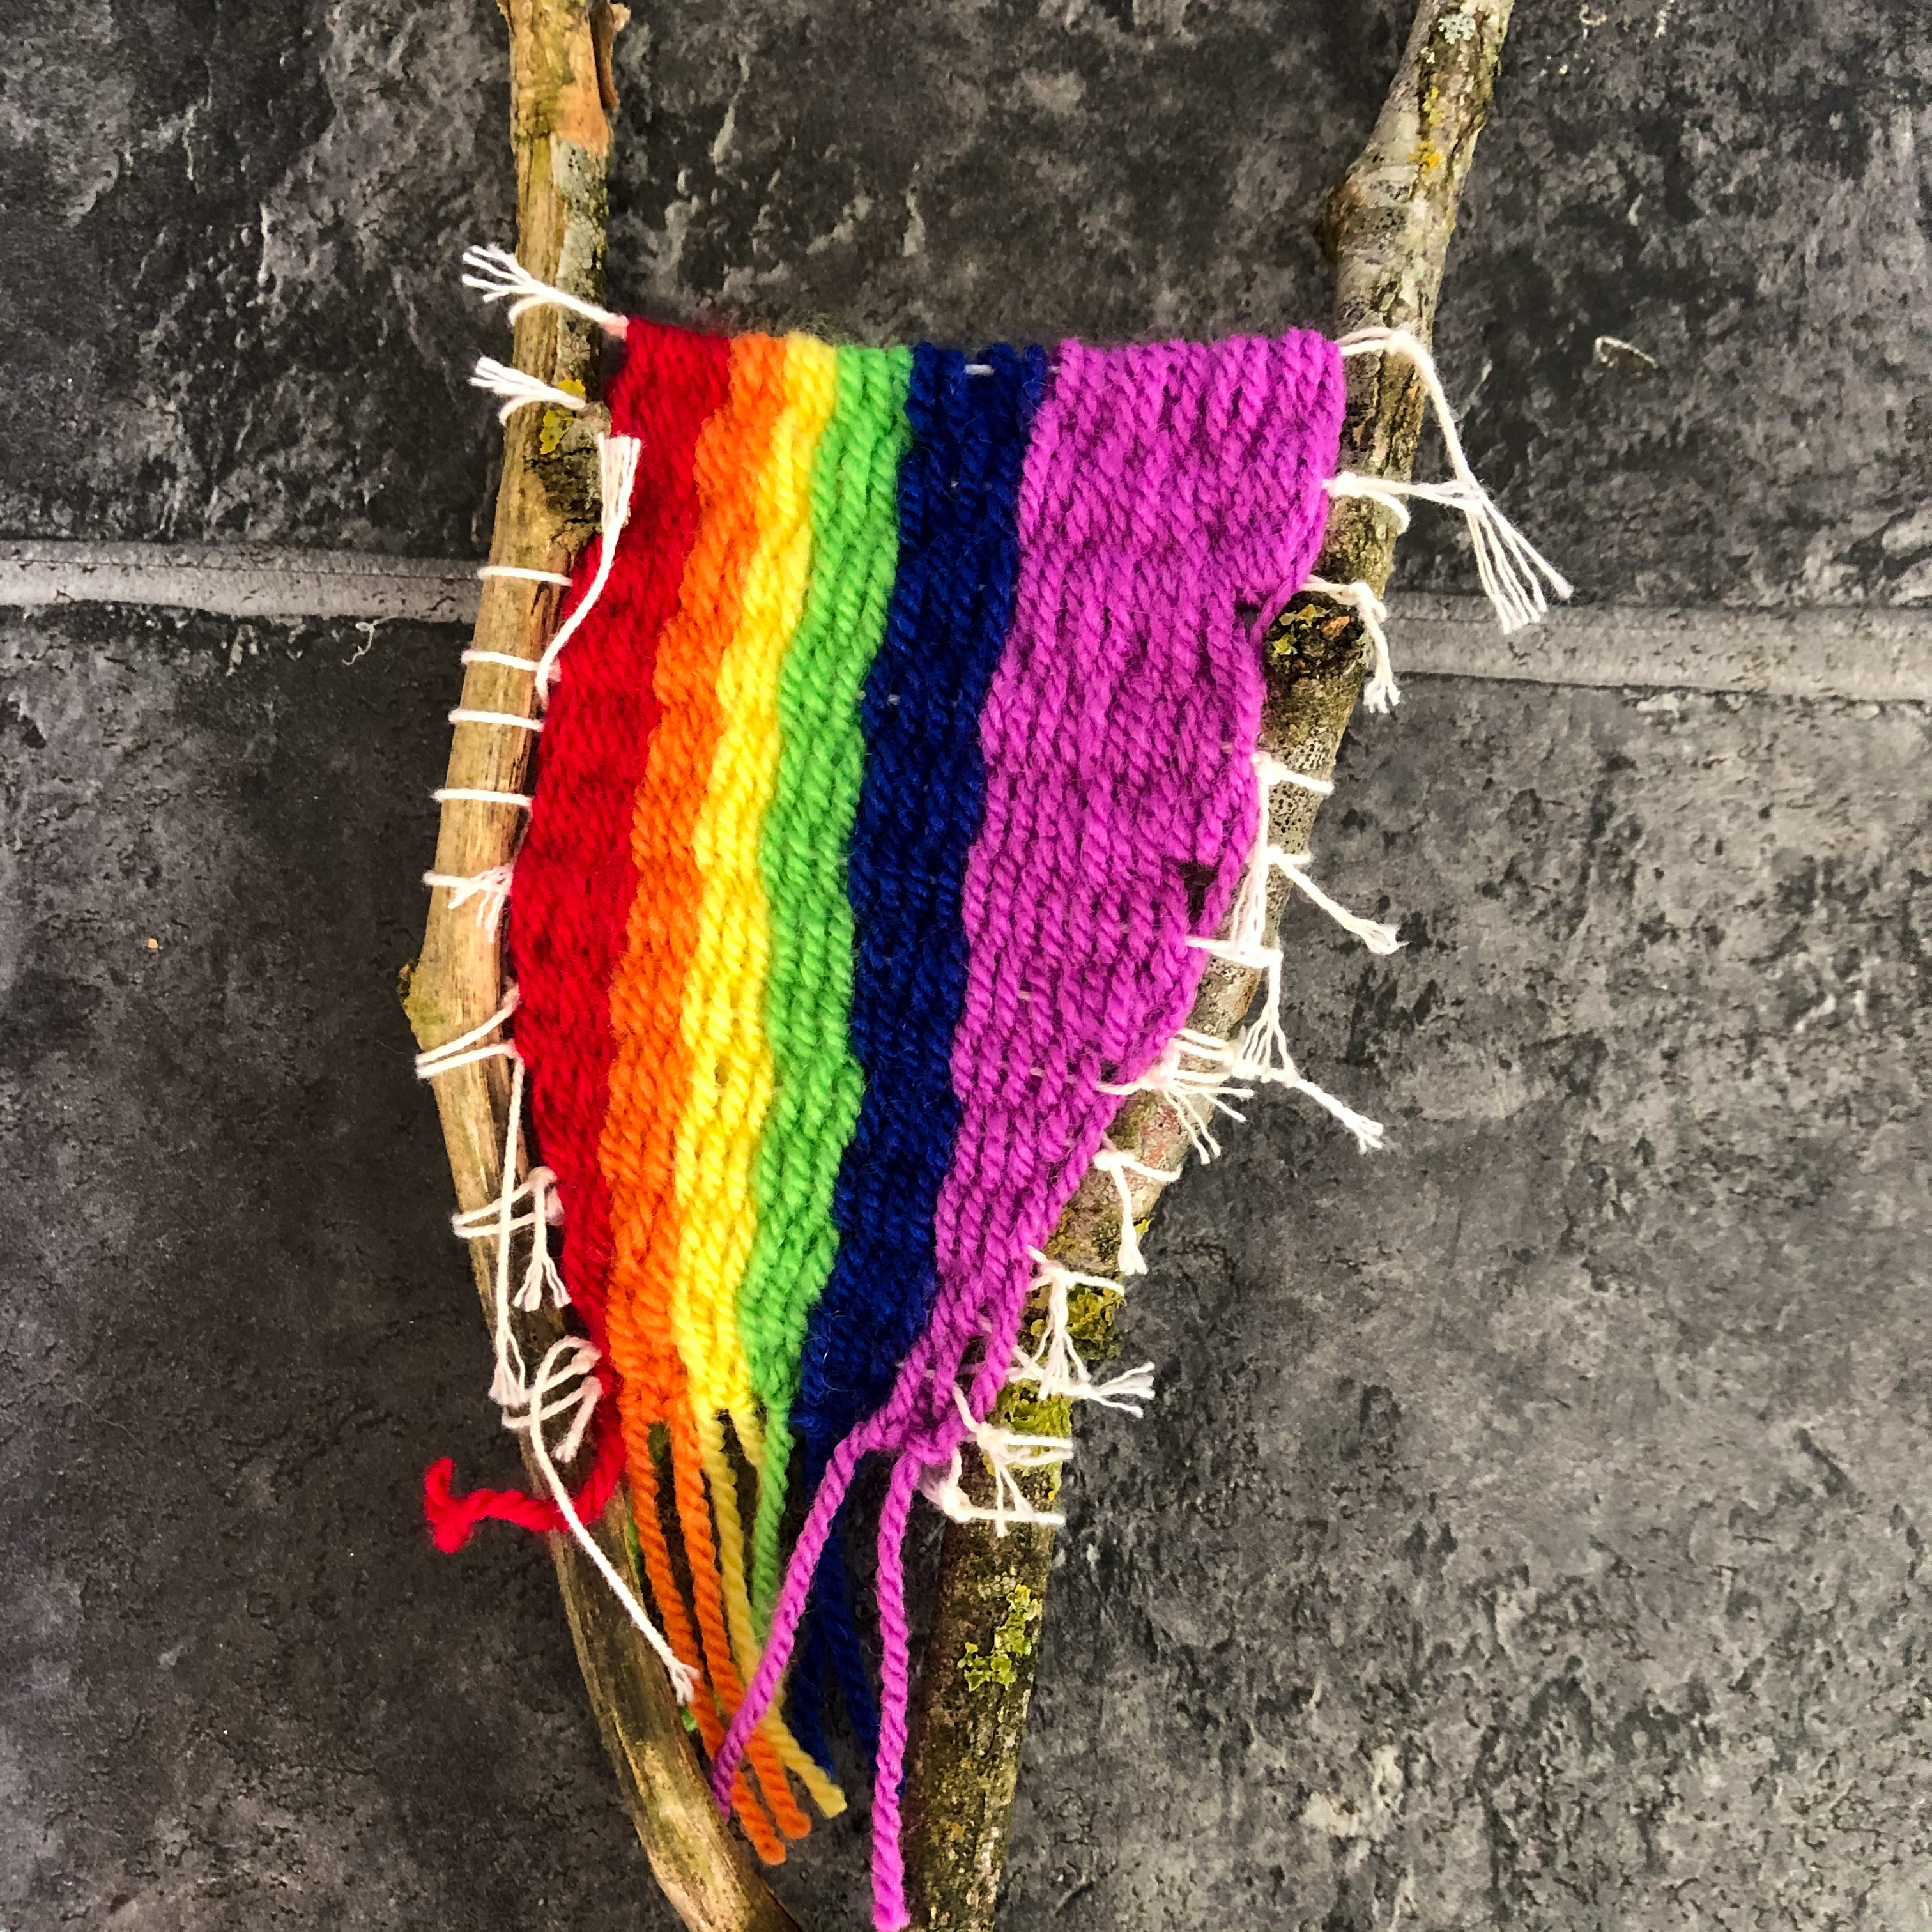
Voila! now find somewhere to show it off!

Leave a reply to Jen @ Raven & Bear Crafts Cancel reply